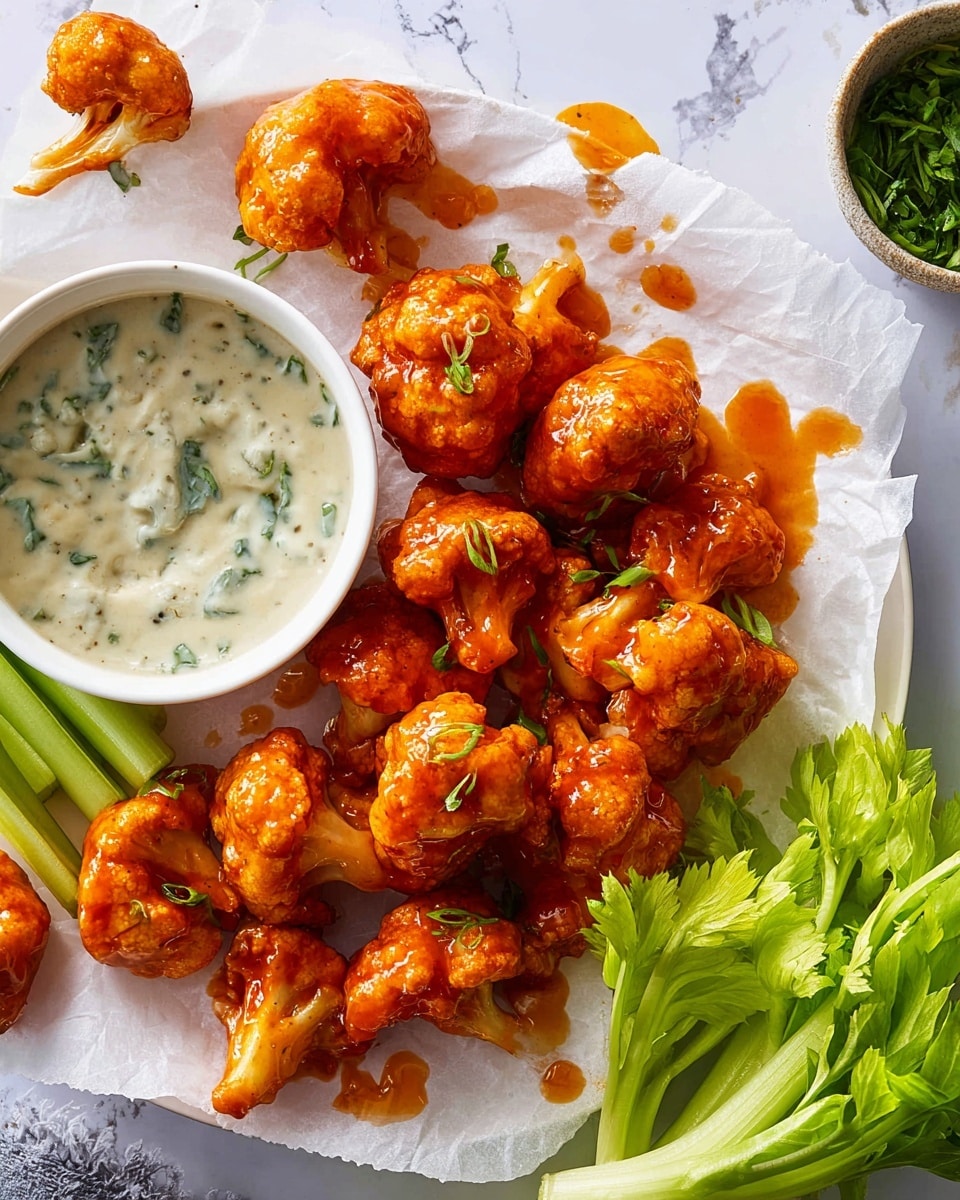
I absolutely love how this Buffalo Cauliflower Wings Recipe turns out—crispy on the outside, tender on the inside, and with that perfect kick of buffalo sauce that you’d expect from classic wings. It’s such a refreshing way to enjoy that spicy, tangy flavor without any chicken involved. Whether you’re looking for a vegetarian appetizer to impress friends or just craving something fun and flavorful, this recipe has you covered.
When I first tried making Buffalo Cauliflower Wings, I was amazed by how easy and satisfying they were to make at home. They’re perfect for game day, casual dinners, or whenever you want a comforting snack that’s both healthy and indulgent. Plus, you’ll find that this recipe is really forgiving and adaptable, so it’s a great addition to your go-to kitchen arsenal.
Why You’ll Love This Recipe
- Simple Ingredients: You probably have most of these staples on hand, making this recipe super approachable.
- Crispy Yet Tender: The perfect batter helps the cauliflower get irresistibly crispy without drying out.
- Vegetarian & Crowd-Pleasing: Great for vegetarians and meat-eaters alike—everyone loves these spicy wings!
- Versatile Serving Options: Pair with your favorite dipping sauce or salad for an easy meal or party snack.
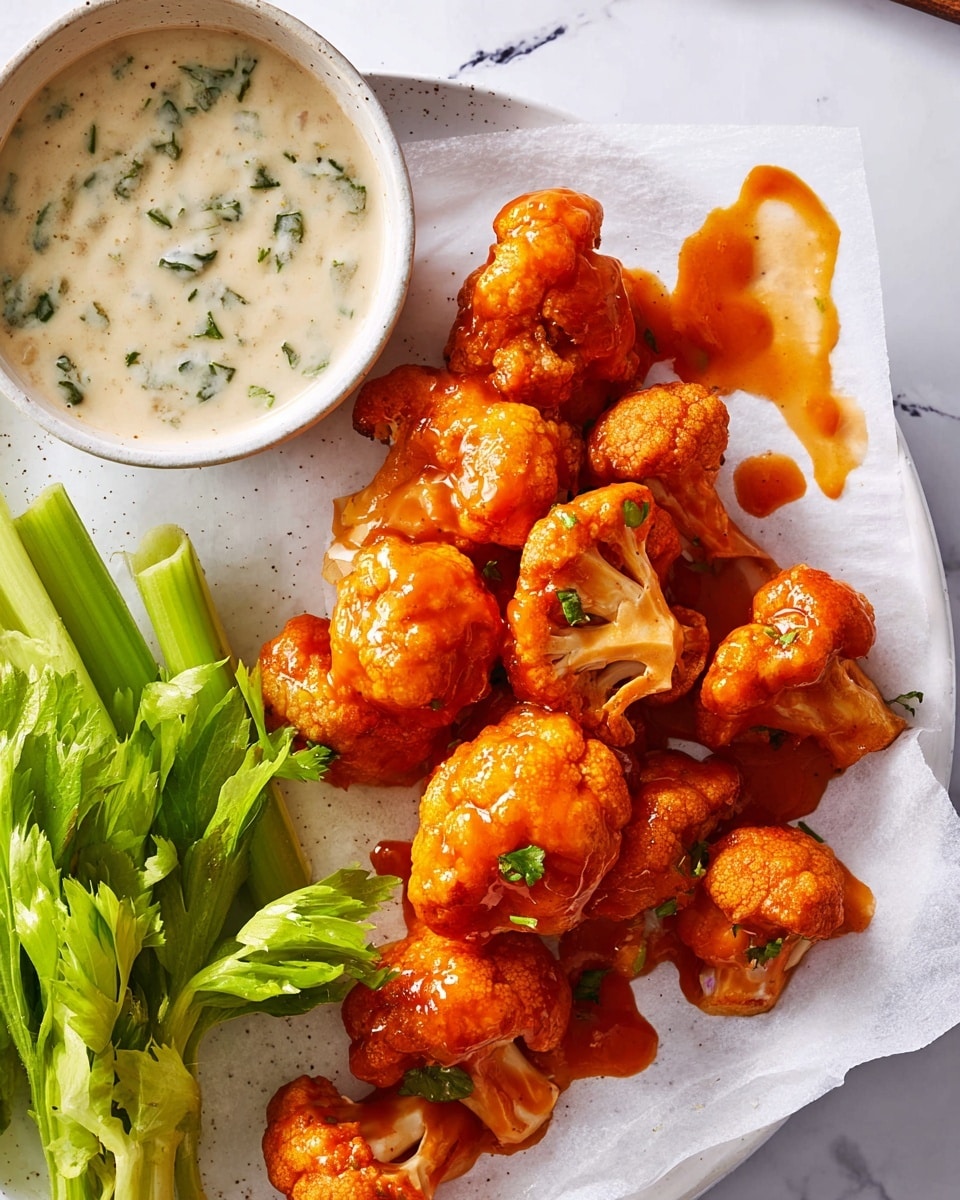
Ingredients You’ll Need
Each ingredient in this Buffalo Cauliflower Wings Recipe plays a role in giving you that crunchy coating and flavorful zing, so choosing good quality basics makes a difference. Let me share some tips on what to look for when shopping.
- All-purpose flour: This forms the base of the batter, helping it stick to the cauliflower and get crispy when baked.
- Cornstarch: Adding cornstarch is my secret weapon to extra crispiness—don’t skip it!
- Garlic powder: Provides subtle depth without overpowering the buffalo sauce later.
- Onion powder: Another layer of savory flavor that blends perfectly in the batter.
- Paprika: Adds warmth and a hint of smokiness to the coating.
- Sea salt: Balances all the flavors and enhances the buffalo punch.
- Water: To mix the batter just right—not too thick, not too runny.
- Cauliflower: Choose a firm, fresh head with tight florets about 2 pounds—breaking them into large chunks helps them hold up during baking.
- Buffalo sauce: Use your favorite store-bought or homemade hot sauce for that iconic tangy heat.
- Ranch dressing (optional): A cooling dip that’s classic for wings, vegan versions work great too.
Note: Exact ingredients and measurements are listed in the recipe card below.
Variations
I love to mix things up sometimes with this Buffalo Cauliflower Wings Recipe depending on my mood or what’s in the fridge. Feel free to let your own taste shine through.
- Spicy Kick: Add cayenne or chili powder to the batter for extra heat. I discovered this trick after craving a serious buffalo burn!
- Vegan Version: Swap all-purpose flour for a gluten-free blend and use vegan buffalo sauce and ranch dip. It’s just as delicious, I promise.
- Air Fryer Method: For quicker crispiness, air fry the coated cauliflower at 400°F for about 15 minutes, flipping halfway through—my family goes crazy for this shortcut.
- Mild Flavor: Reduce paprika and opt for a milder buffalo sauce if you prefer less spice.
How to Make Buffalo Cauliflower Wings Recipe
Step 1: Prep the Cauliflower and Batter
First, preheat your oven to 450°F and line two baking sheets with parchment paper—this keeps everything crisp and helps with easy cleanup. While the oven’s warming up, whisk together the flour, cornstarch, garlic powder, onion powder, paprika, and sea salt in a large bowl. Slowly add the water and whisk until the batter is smooth and free of lumps. Now, break your cauliflower into large florets—think bite-sized but not too small—and toss them in the batter coating each piece completely. I like lifting them out carefully and letting excess batter drip off; this prevents clumps and uneven cooking.
Step 2: Bake Twice for Crispy Perfection
Arrange the battered florets in a single layer on the baking sheets—you want them spaced out so they crisp up nicely instead of steaming. Bake for 10 minutes, then use a spatula to flip each piece to the other side. Swap the pans between your oven racks for even heat distribution, and bake for another 10 minutes. I learned early on that flipping halfway is crucial for that signature crunch all around.
Step 3: Sauce and Finish Baking
After the 20 minutes of initial baking, remove the cauliflower and brush each floret generously with buffalo sauce. Pop them back into the oven for another 12 to 15 minutes. You’ll see the edges start to darken and become crisp—this is the magic moment when the flavors really come together. Once done, give them one last brush of buffalo sauce for that final punch of heat and tang.
Pro Tips for Making Buffalo Cauliflower Wings Recipe
Pro Tips for Making Buffalo Cauliflower Wings Recipe
- Drain Batter Well: Let the excess batter drip off before baking to avoid soggy spots.
- Flip Carefully: Use a thin spatula to gently flip the florets halfway through for even crunch.
- Brush on Sauce Twice: Brushing sauce before the last bake and right after helps the buffalo flavor stick and crisp up.
- Avoid Overcrowding: Give each piece room on the pan so they bake evenly and get that golden edges.
How to Serve Buffalo Cauliflower Wings Recipe
Garnishes
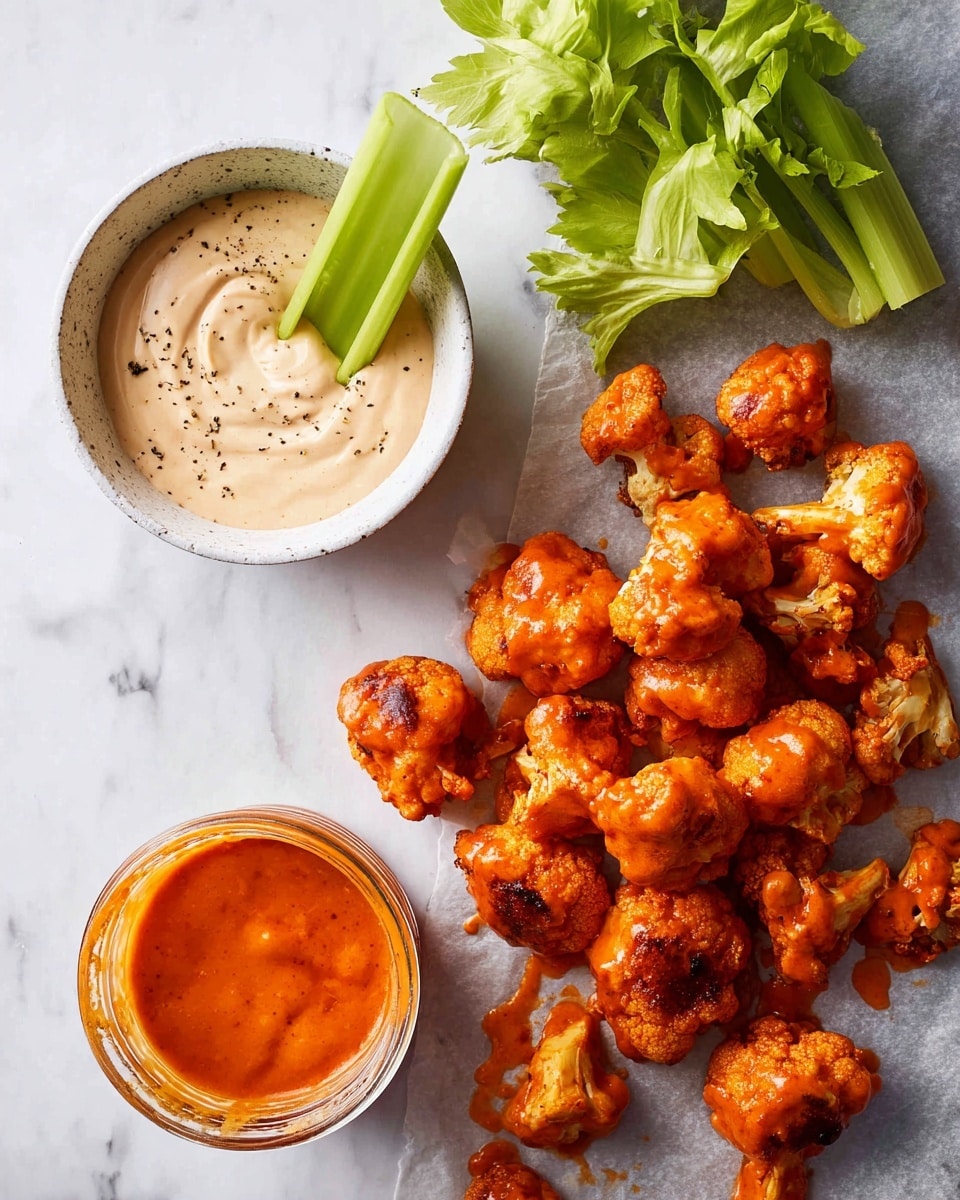
I love topping these wings with a sprinkle of fresh chopped parsley or green onions—it adds a bright, fresh contrast to all the spice. Sometimes I also add a few celery sticks on the side, just like classic buffalo wings, because that crisp crunch balances the heat beautifully.
Side Dishes
This recipe pairs perfectly with creamy ranch or blue cheese dressing for dipping. On the side, I often serve crispy sweet potato fries, coleslaw, or a light leafy green salad to round out the meal without overshadowing those bold buffalo flavors.
Creative Ways to Present
For parties, I like to serve these in a rustic wooden bowl lined with parchment and accompany with little ramekins of dip and extra buffalo sauce. Sometimes, I pile them high on a platter with colorful veggie sticks creating a vibrant and inviting spread that guests can’t resist digging into.
Make Ahead and Storage
Storing Leftovers
If you have leftovers, I recommend storing them in an airtight container in the fridge. They’ll keep well for up to 3 days, though best enjoyed within 24 hours for peak crispiness. When I’ve saved some, the texture is still surprisingly good the next day.
Freezing
I’ve also frozen these wings successfully. After baking and saucing, I let them cool completely, then freeze on a baking sheet before transferring to a freezer bag. This prevents sticking and helps keep their shape. They freeze well for up to 2 months.
Reheating
To reheat, I pop the wings in a preheated oven at 425°F for about 10 minutes—this revives their crisp edges better than the microwave, which tends to make them soggy. A quick extra brush of buffalo sauce before serving freshens up their flavor perfectly.
FAQs
-
Can I make this Buffalo Cauliflower Wings Recipe gluten-free?
Absolutely! Just swap the all-purpose flour for a gluten-free flour blend, and make sure your buffalo sauce and spices don’t contain any gluten ingredients. The cornstarch in the recipe also helps keep the texture light and crispy.
-
How spicy are the buffalo wings, and can I adjust the heat?
The heat depends on the buffalo sauce you choose. I usually pick a medium-spicy sauce, but if you want more or less heat, you can tailor the sauce and add spices like cayenne accordingly. It’s easy to customize the spice level to your preference.
-
Is it better to bake or air fry these cauliflower wings?
Both work great! Baking is easy and gets wonderfully crispy, especially with flipping halfway through. Air frying is faster and produces a fantastic crunch, too. I recommend whichever method fits your kitchen and time best.
-
Can I prepare the cauliflower in advance?
You can prep the batter and cauliflower an hour ahead and keep it covered in the fridge, but I don’t recommend battering them too far in advance as the texture can get soggy. It’s best to bake soon after coating for max crispness.
Final Thoughts
This Buffalo Cauliflower Wings Recipe quickly became one of my favorites for both weeknight dinners and entertaining. It’s a crowd-pleaser that feels indulgent without being heavy, and the process is so simple you’ll want to make it again and again. I truly encourage you to give it a try—you might just find your new go-to snack that everyone asks for at your next gathering!
PrintBuffalo Cauliflower Wings Recipe
Crispy, spicy Buffalo Cauliflower Wings are a delicious vegetarian alternative to traditional chicken wings. Coated in a flavorful seasoned batter and baked to perfection, these cauliflower florets are tossed in tangy buffalo sauce, making them perfect for game day or a tasty snack paired with ranch dressing.
- Prep Time: 15 minutes
- Cook Time: 35 minutes
- Total Time: 50 minutes
- Yield: Serves 4
- Category: Appetizer
- Method: Baking
- Cuisine: American
- Diet: Vegetarian
Ingredients
Batter and Cauliflower
- 2/3 cup all-purpose flour, spooned and leveled
- 1/4 cup cornstarch
- 1 teaspoon garlic powder
- 1 teaspoon onion powder
- 1 teaspoon paprika
- 1/2 teaspoon sea salt
- 3/4 cup water
- 1 cauliflower, about 2 pounds, broken into large florets
Sauce and Serving
- Buffalo sauce, for brushing
- Ranch dressing or vegan ranch, for dipping (optional)
Instructions
- Preheat Oven: Preheat the oven to 450°F and line two large baking sheets with parchment paper to ensure easy cleanup and prevent sticking.
- Prepare Batter: In a large bowl, whisk together the flour, cornstarch, garlic powder, onion powder, paprika, and salt. Add the water and whisk until the batter is smooth and free of lumps.
- Coat Cauliflower: Add the cauliflower florets to the batter and stir gently to evenly coat each floret with the batter mixture.
- Bake First Half: Using a spatula or tongs, lift the coated cauliflower florets out of the batter allowing excess to drip back into the bowl. Arrange them in a single layer on the prepared baking sheets. Bake for 10 minutes.
- Flip and Bake Again: Carefully flip each floret using a spatula. Swap the baking sheets’ positions on the oven racks to ensure even cooking. Bake for an additional 10 minutes.
- Brush with Buffalo Sauce and Bake: Remove the cauliflower from the oven and brush them generously with buffalo sauce. Return to the oven and bake for another 12 to 15 minutes until the cauliflower is dark, crisp, and slightly browned around the edges.
- Final Sauce Brush and Serve: Take the cauliflower wings out of the oven and brush with more buffalo sauce for extra flavor. Serve immediately with ranch or vegan ranch dressing on the side for dipping if desired.
Notes
- For extra crispy wings, ensure the cauliflower florets are evenly coated but not dripping with batter.
- You can adjust the spiciness of the buffalo sauce based on your preference.
- These wings are best served fresh out of the oven for maximum crispiness.
- To make it vegan, use vegan buffalo sauce and vegan ranch dressing.
- Storing leftovers in an airtight container in the refrigerator is possible, but reheat in an oven or air fryer to restore crispiness.

