

There’s something incredibly inviting about a beautifully arranged cheese board—it’s like an edible work of art that instantly brings people together. When I first learned how to make a delicious cheese board recipe, I was amazed at how simple it was to impress guests without hours in the kitchen. Whether it’s a last-minute snack or a special occasion centerpiece, cheese boards have this magical ability to feel both casual and elegant at the same time.
I love this recipe because it’s flexible and forgiving, perfect for anyone who wants to elevate their hosting game effortlessly. You get to mix and match your favorite cheeses, fruits, and snacks, creating combinations that suit your tastes and preferences. Trust me, once you learn how to make a delicious cheese board recipe, you’ll find it’s your go-to solution for gatherings, date nights, or even solo indulgence over a good book or movie.
Why You’ll Love This Recipe
- Effortlessly Stunning: It requires almost no cooking but looks like you spent hours perfecting it.
- Customizable Flavors: You can easily swap ingredients to suit your preferences or dietary needs.
- Great for All Occasions: Perfect for casual gatherings, fancy parties, or even solo snacking sessions.
- Quick to Assemble: It takes just 15 minutes from start to finish—ideal for last-minute entertaining.
Ingredients You’ll Need
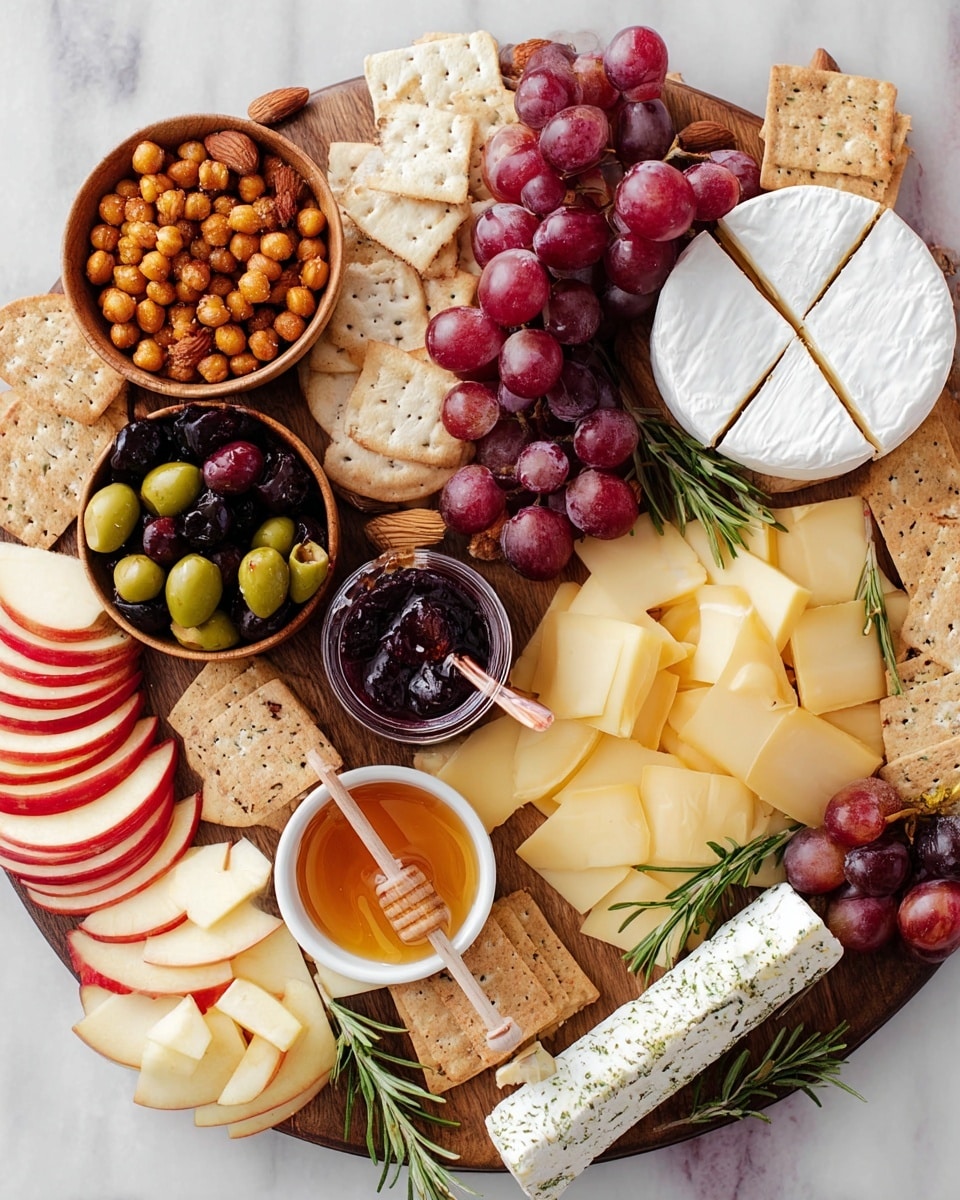
Picking the right balance of cheeses, fruits, and extras is key to an irresistible cheese board. I always recommend mixing textures and flavors that complement each other to keep every bite exciting.
- White Cheddar Cheese: Sharp and flavorful, it’s a crowd favorite that pairs well with almost everything.
- Herbed Goat Cheese or Sheep’s Milk Cheese: Adds a creamy, tangy note with a fresh herbal twist.
- Brie Cheese: Rich and buttery, perfect for spreading on crackers.
- Crackers or Flatbread Crisps: Choose a neutral base that won’t overpower the cheeses.
- Apples or Pears: Adds a crisp, juicy sweetness that balances the savory cheeses.
- Grapes: Small bunches are perfect for easy snacking and add a burst of freshness.
- Olives: Bring a salty complexity to the board—choose a mix if you like variety.
- Almonds: Offer a crunchy texture and a subtle nutty flavor.
- Tart Cherry or Fig Jam: A little sweetness to contrast the cheeses’ richness.
- Honey (optional): Drizzle a touch for a warm floral sweetness.
- Roasted Chickpeas (optional): Great for adding a crunchy, protein-packed snack.
- Rosemary or Thyme (for garnish): Herbs bring color and aromatic freshness.
Note: Exact ingredients and measurements are listed in the recipe card below.
Variations
I’m a big fan of customizing cheese boards based on the season or occasion. Feel free to swap in your favorite fruits, nuts, or spreads to make it uniquely yours—you’ll enjoy the creative freedom!
- Seasonal Fruits: In autumn, swap pears for figs or pomegranate; in summer, try berries or stone fruits. My family loves this change-up as it keeps things fresh throughout the year.
- Vegan Option: Use plant-based cheeses and add marinated veggies or hummus for a satisfying and inclusive board.
- Spice It Up: Add a jalapeño or spicy honey drizzle to surprise your guests with a little kick.
- Low Carb: Skip the crackers and add extra nuts, olives, and sliced cucumbers for crunch without the carbs.
How to Make How to Make a Delicious Cheese Board Recipe
Step 1: Select and Prepare Your Ingredients
Start by choosing your cheeses and snacks. Slice the cheddar and brie into manageable pieces, and if you’re using fresh apples or pears, slice them thinly to make them easy to pick up. Arrange grapes in small bunches to keep the board tidy and visually appealing. If you want, take olives out of the jar and almonds out of the shell to make snacking seamless.
Step 2: Arrange on a Platter with Care
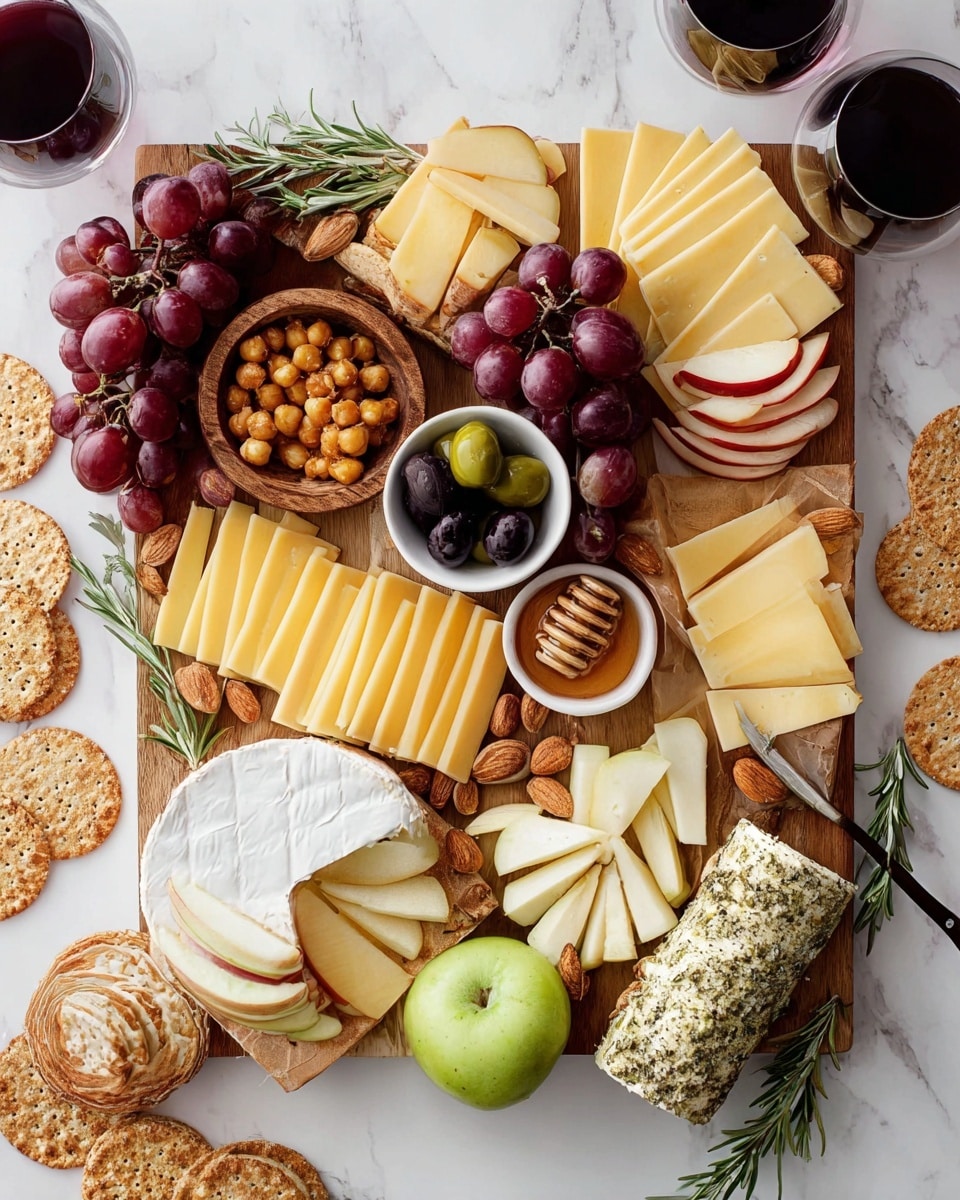
I like to start by placing the cheeses spaced apart to create “anchor points” on the board. Then, I fill in the gaps with crackers, fruits, nuts, and jams, making sure to balance colors and textures. Don’t be afraid to pile and layer—it gives a generous, abundant look that invites people to dig in.
Step 3: Garnish and Serve
Finishing touches like fresh rosemary or thyme sprigs add that extra aromatic pop and a rustic vibe. If you’re using honey or jam, place them in small bowls or ramekins for easy dipping. Your cheese board is ready to wow your guests!
Pro Tips for Making How to Make a Delicious Cheese Board Recipe
- Room Temperature Cheese: Always let your cheeses come to room temp before serving for the best flavor and texture.
- Use Varied Knife Styles: Include spreaders for soft cheeses and sharp knives for harder ones to enhance the experience.
- Think Color and Texture: Aim for a mix of creamy, crunchy, sweet, and savory to keep the palate interested.
- Avoid Overcrowding: Leave some space on your board so guests can easily pick their favorites without making a mess.
How to Serve How to Make a Delicious Cheese Board Recipe
Garnishes
My go-to garnishes are fresh rosemary and thyme—they add a lovely herbal aroma and a pop of green that makes the whole board look elevated. A sprinkle of edible flowers can be a delightful touch for special occasions. Plus, I sometimes add a few dried fruits like apricots or figs if I want a sweet contrast.
Side Dishes
For classic pairing, I like to offer a little bowl of honeycomb or a side of olives and marinated artichokes. Some crisp veggies like cucumber or cherry tomatoes also add brightness and balance richer flavors. A fresh baguette or some crusty bread rounds out the experience perfectly.
Creative Ways to Present
Once, I surprised my guests by assembling mini cheese boards on individual wooden boards for a picnic-style event—everyone loved the personalized touch. For holidays, I’ve shaped boards into wreaths with alternating colors of fruit and cheese. Colorful slate or marble trays also give a sophisticated backdrop that makes the cheeses pop beautifully.
Make Ahead and Storage
Storing Leftovers
I wrap leftover cheeses tightly in wax paper or parchment and then cover in plastic wrap to keep them fresh without sweating. Store fruits separately in airtight containers to maintain their crispness. Usually, cheese boards don’t last more than a day or two, so plan accordingly.
Freezing
Freezing is generally not ideal for fresh cheeses or fruits on the board as it alters texture and flavor. However, if you have hard cheeses like cheddar left, you can freeze them for later use in cooking rather than serving fresh.
Reheating
Because this is a no-cook assembly, reheating isn’t really needed. But if you want soft cheese like brie warm, just pop it in a low oven for a few minutes before serving next time—you’ll get that lovely melty effect that’s irresistible.
FAQs
-
What is the best way to choose cheeses for a cheese board?
I recommend selecting cheeses with varied textures and flavors—think a sharp cheddar, a creamy brie, and a tangy goat cheese. This variety keeps each bite interesting and appeals to different palates. Including a mix of hard, soft, and semi-soft cheeses is a great rule of thumb.
-
Can I make a cheese board ahead of time?
You can prep many elements ahead: slice cheeses, cut fruits, and have nuts or crackers ready. However, it’s best to assemble the board close to serving time to keep everything fresh and looking its best. If you must assemble early, cover tightly with plastic wrap and refrigerate.
-
What should I serve with a cheese board?
Besides the cheese board essentials, I like to serve crusty bread, honey, jams, assorted olives, and fresh veggies. A light wine or sparkling water pairs beautifully depending on your mood and occasion.
-
How do I keep crackers crispy on a cheese board?
Store crackers in an airtight container until just before serving and place them on the board last to avoid moisture from fruits or cheeses making them soggy. You can also keep crackers in a separate bowl if you want to control how much exposure they get to humidity.
Final Thoughts
Honestly, how to make a delicious cheese board recipe is one of those simple pleasures that feels impressive but is incredibly easy to put together. I’ve seen how it brings smiles and sparks conversation every time I bring one to a gathering. Now that you know my tips and tricks, I hope you’ll invite your friends over and give this a try—it’s a recipe that impresses even the pickiest cheese lovers without breaking a sweat.
PrintHow to Make a Delicious Cheese Board Recipe

Create an elegant and delicious cheese board featuring a curated selection of cheeses, crackers, fruit, nuts, and accompaniments perfect for entertaining or casual snacking.
- Prep Time: 15 minutes
- Cook Time: 0 minutes
- Total Time: 15 minutes
- Yield: Serves 8
- Category: Appetizer
- Method: No-Cook
- Cuisine: American
Ingredients
Cheese & Crackers
- 8 ounces white cheddar cheese, sliced
- 4 ounces herbed goat cheese or sheep’s milk cheese
- 8 ounces brie cheese
- Crackers or flatbread crisps, as desired
Other Snacks
- 2 apples or pears, sliced
- 8 small bunches grapes
- 1/2 cup olives
- 1/2 cup almonds
- Tart cherry or fig jam, amount as desired
- Honey, optional, amount as desired
- Roasted chickpeas, optional, amount as desired
- Rosemary or thyme, for garnish
Instructions
- Choose Your Ingredients: Select the cheeses, fruits, nuts, and other snacks from the ingredient list based on your preference and availability.
- Slice and Prepare: Slice the white cheddar cheese and apples or pears into bite-sized pieces for easy serving.
- Arrange on Platter: Artistically arrange all chosen ingredients—cheeses, crackers or flatbread, fruits, nuts, olives, jams, honey, and optional roasted chickpeas—on a large serving platter, balancing colors and shapes for visual appeal.
- Garnish: Add sprigs of rosemary or thyme to the platter to enhance presentation and add a hint of fresh aroma.
- Serve: Present the cheese board immediately or cover lightly and refrigerate briefly until serving to keep ingredients fresh.
Notes
- Choose a variety of textures and flavors for a well-rounded cheese board.
- Allow cheeses to come to room temperature before serving for best taste.
- Accompany with your favorite crackers, bread, or flatbreads to complement the cheeses.
- Optional items like honey and roasted chickpeas can add sweetness and crunch.
- Garnishing with fresh herbs enhances both look and aroma.

