
If you’re searching for a refreshingly simple treat that’s perfect for summer afternoons or any get-together, Lindy’s Lemon Ice Recipe is an absolute gem. I love this recipe because it’s incredibly easy to make, uses just a handful of ingredients, and delivers a bright, crisp lemon flavor that feels like sunshine in a cup. Whether you’re cooling off from a hot day or need a cool drink to brighten your party, you’ll find that this lemon ice hits the spot every time.
When I first tried Lindy’s Lemon Ice, I was surprised by how the combination of lemon extract and citric acid created such an intense, authentic lemon taste without needing fresh lemons. It’s a recipe that even busy cooks can whip up in minutes but still impress family and friends. Plus, it’s easy to tweak based on your taste, which makes it a go-to in my kitchen whenever I want something sweet, tangy, and utterly refreshing.
Why You’ll Love This Recipe
- Super Quick to Make: You can prepare Lindy’s Lemon Ice Recipe in about a minute, making it perfect for last-minute gatherings.
- Bright, Authentic Lemon Flavor: The lemon extract and citric acid combine to create a tart and sweet balance that’s hard to beat.
- Kid-Friendly and Crowd-Pleasing: My family goes crazy for this on warm days, and it’s a hit with guests of all ages.
- Minimal Ingredients, Maximum Taste: This recipe uses pantry staples you probably already have on hand, which makes it super convenient.
Ingredients You’ll Need
Every ingredient in Lindy’s Lemon Ice Recipe plays a key role in delivering that perfect lemon ice experience. Here’s a quick look at what you’ll need and why I recommend these staples.
- Water: The foundation of this refreshing treat; use cold, filtered water for the best taste.
- Lemon Extract: This is your main flavor punch – I prefer pure lemon extract to get that bright, zesty aroma.
- Sugar: Balances the tartness perfectly – I use regular granulated sugar but feel free to try fine sugar for quicker dissolving.
- Citric Acid: Adds that tangy, lemony bite that freshens the whole drink. You might find this in canning or baking sections.
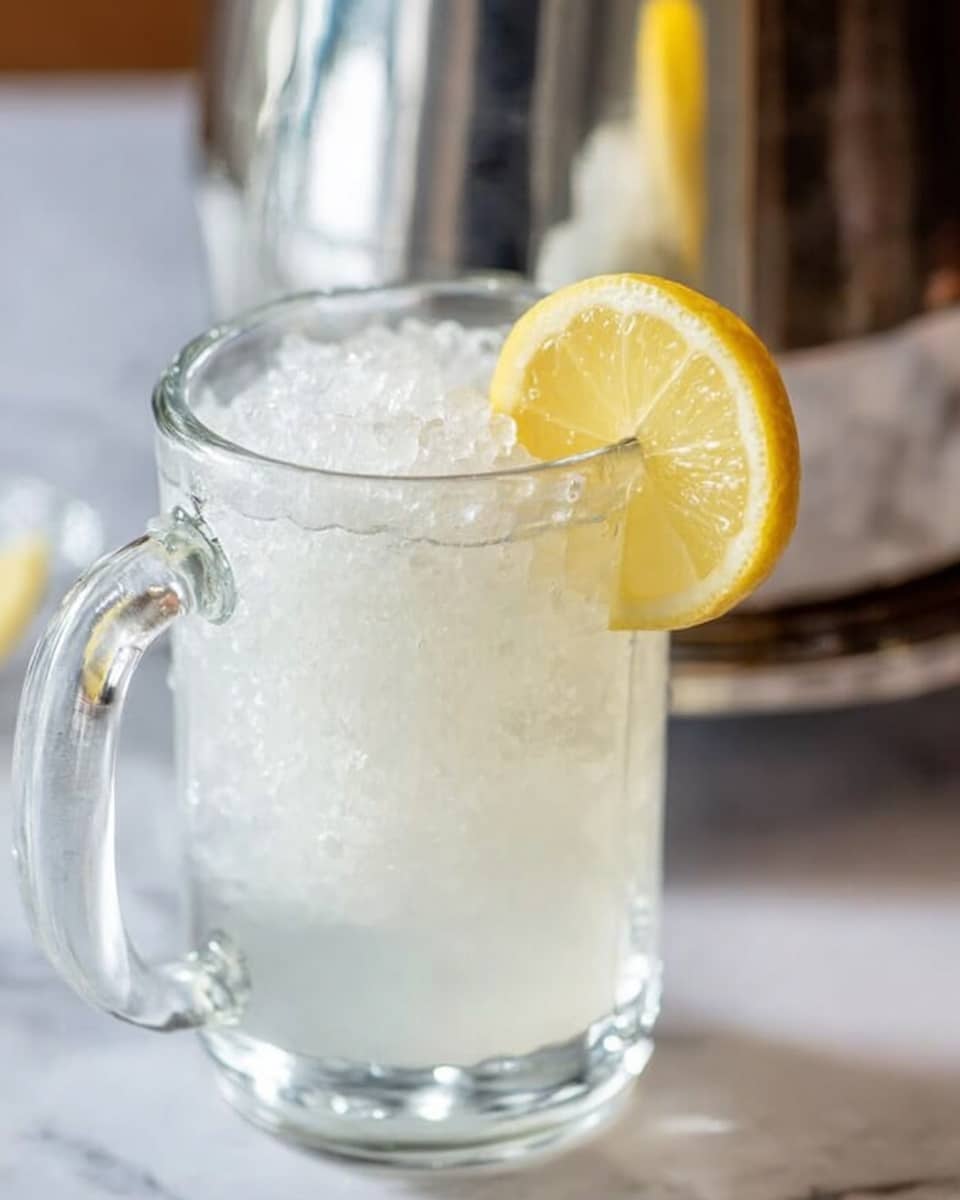
- Pebble Ice: Using pebble ice rather than crushed or cubed makes the lemon ice that wonderfully slushy texture we all love.
Note: Exact ingredients and measurements are listed in the recipe card below.
Variations
One of the things I love about Lindy’s Lemon Ice Recipe is how easy it is to personalize. Over time, I’ve tried different spins to keep it fresh and exciting, and you might enjoy playing around with these variations too.
- Make it Sparkling: Add some sparkling water instead of still for a bubbly twist that brightens up the lemon flavor even more.
- Lower Sugar Version: I’ve reduced sugar by a third for a less sweet, more tart version – still delicious and a bit lighter on the calories.
- Add Fresh Herbs: Mint leaves or basil add a lovely herbal note that gives the ice a gourmet touch; I like muddling them lightly before mixing in the water.
- Fruit-Infused: Adding frozen berries or a splash of orange juice offers a playful fruit combo I tried once and totally loved.
How to Make Lindy’s Lemon Ice Recipe
Step 1: Mix Your Base Ingredients
Start by pouring 2 quarts of cold water into a large drink dispenser or pitcher. Then, add 2 tablespoons of lemon extract, 3 cups of sugar, and 2 tablespoons of citric acid. Stir gently but thoroughly until the sugar and citric acid are completely dissolved. I discovered this trick when I realized that if you don’t stir enough, the mixture ends up grainy, which takes away from that smooth, icy texture we want.
Step 2: Add Pebble Ice and Serve
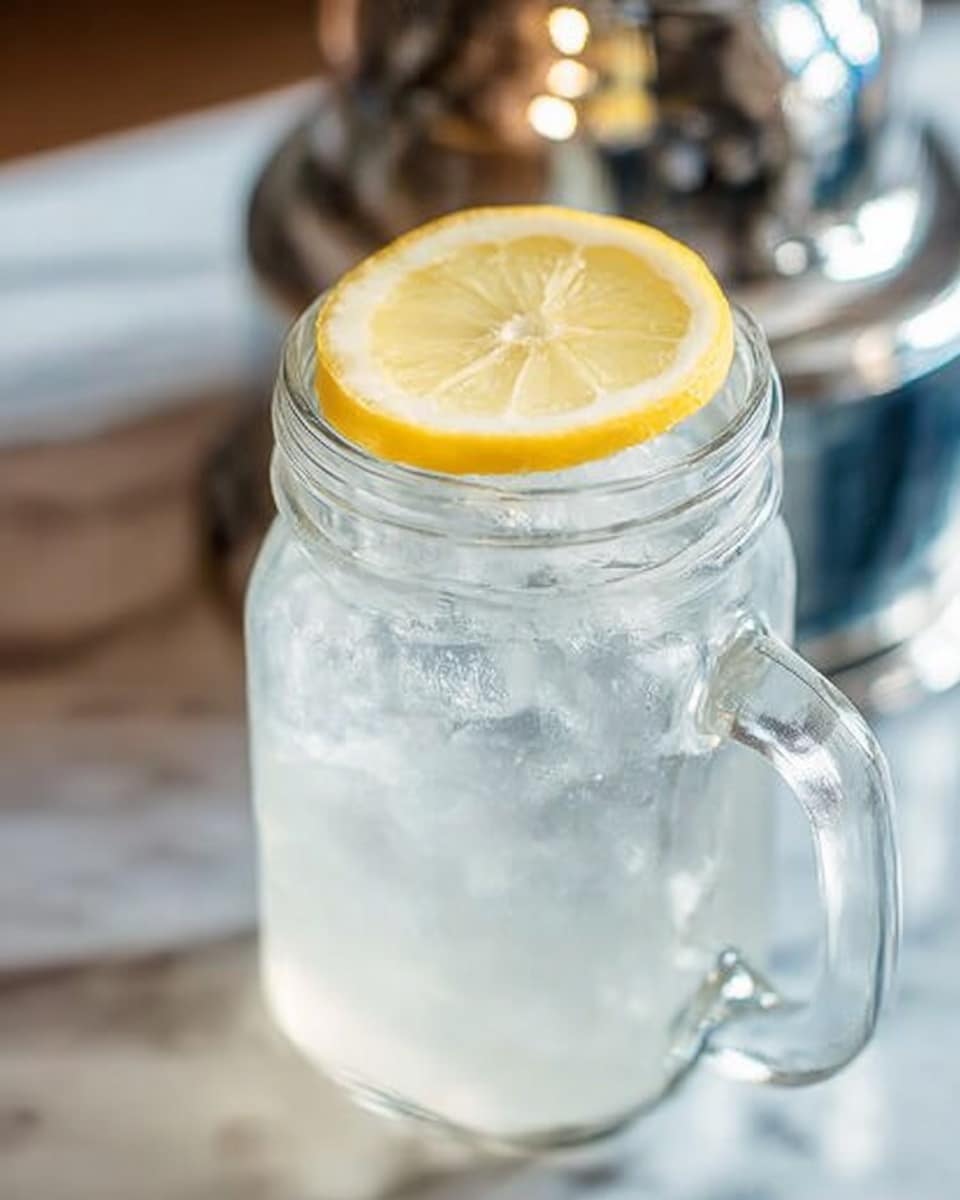
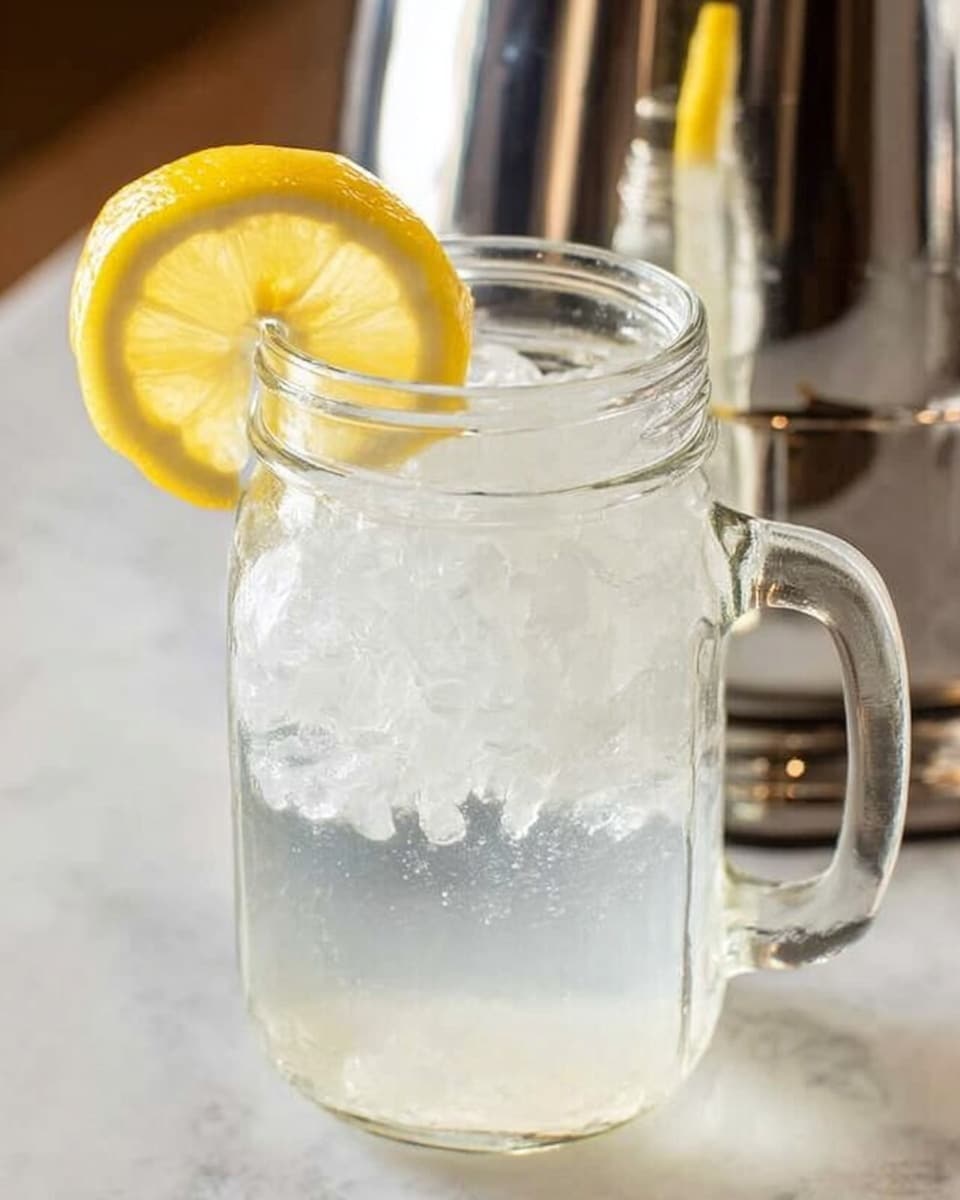
Next, fill your container with plenty of pebble ice. This type of ice is crucial because it absorbs the liquid and keeps every sip cold and slushy without watering down the flavors too quickly. Stir once more gently just to combine, and serve immediately. When I serve this at parties, I always keep extra pebble ice on hand to refill glasses so everyone enjoys that perfect chill.
Pro Tips for Making Lindy’s Lemon Ice Recipe
- Use Cold Water: I found the ice melts slower and keeps the drink perfectly chilled when the base water starts cold.
- Citric Acid Balance: Don’t skip the citric acid—it really makes the lemon flavor pop without extra acidity from fresh lemons.
- Choose Pebble Ice: If you can’t find pebble ice, crush standard ice finely yourself to get that ideal texture.
- Avoid Over-Stirring with Ice: Stir gently after adding ice to prevent it from melting too fast and watering down your drink.
How to Serve Lindy’s Lemon Ice Recipe
Garnishes
I like to keep it simple with fresh lemon slices and a sprig of mint as garnishes—they add a pop of color and a fresh aroma that pairs beautifully with the icy sweetness. Sometimes I toss in a couple of frozen raspberries for an extra touch of elegance and flavor contrast. It really amps up the presentation, especially if you’re serving guests.
Side Dishes
Since Lindy’s Lemon Ice Recipe is so light and refreshing, it pairs wonderfully with light snacks or summer-friendly dishes. I often serve it alongside grilled chicken skewers, fresh fruit platters, or even delicate finger sandwiches during afternoon gatherings. The lemon ice acts like a palate cleanser, keeping things bright and lively.
Creative Ways to Present
For a special occasion, try serving Lindy’s Lemon Ice in clear mason jars with colorful striped paper straws—my kids loved this festive vibe during last summer’s birthday party. You can also freeze some lemon slices into cube molds beforehand for a fancy touch that looks stunning and adds occasional bursts of lemon as the ice melts.
Make Ahead and Storage
Storing Leftovers
If you happen to have leftovers, I usually store the lemon ice mixture (without ice) in a sealed pitcher or container in the fridge. It keeps beautifully for up to 3 days, but I recommend stirring it gently before serving again as some ingredients may settle. Keep the ice separate to maintain that perfect slushy texture.
Freezing
Freezing Lindy’s Lemon Ice Recipe in an ice pop mold is something I tried and enjoyed—the flavor remains crisp and refreshing. Just pour the mixture (without ice) into molds and freeze. It’s a fun way to enjoy lemon ice on a stick, especially for kids and as a party favor!
Reheating
Since this is a cold treat, reheating isn’t really necessary. But if you want the liquid without ice, just let the refrigerated lemon ice sit for a few minutes at room temperature, then stir well before serving. This helps reincorporate any settled sugar or citric acid for even flavor every time.
FAQs
-
Can I use fresh lemon juice instead of lemon extract in Lindy’s Lemon Ice Recipe?
While fresh lemon juice can add a natural flavor, it also introduces pulp and alters the acidity level, which may impact the texture and clarity of the lemon ice. Lemon extract and citric acid together give a consistent strong lemon flavor without extra pulp, which is why the original recipe prefers them. If you’d like to experiment, adjust sugar and citric acid to balance the tartness when using fresh juice.
-
What is the best type of ice to use for Lindy’s Lemon Ice Recipe?
Pebble ice is ideal for this recipe because its small size absorbs the lemon ice mixture and creates a slushy texture that stays cold longer. If pebble ice isn’t available, finely crushed ice works well as a substitute. Avoid large ice cubes as they don’t provide the same refreshing slush experience.
-
How long does Lindy’s Lemon Ice Recipe stay fresh?
The lemon ice mixture (without the ice) can be stored in the refrigerator for up to 3 days. Be sure to stir it before serving again since some ingredients might settle. Once ice is added, it’s best to consume immediately for the best texture and flavor.
-
Can I make Lindy’s Lemon Ice Recipe vegan or sugar-free?
Yes! The original recipe is already dairy-free and vegan. For a sugar-free version, you can experiment with natural sweeteners like stevia or erythritol, but keep in mind that texture and sweetness levels might shift. I recommend adjusting quantities gradually and tasting as you go.
Final Thoughts
I absolutely love how Lindy’s Lemon Ice Recipe brings together simplicity and bright, fresh flavor in such a quick and easy way. It’s become one of my family’s favorite summer treats, and I’m confident you’ll enjoy it too—whether you’re serving it at a backyard barbecue or just want a refreshing break during a busy day. Trust me, once you try this recipe, it’s going to be your go-to for hot days ahead. Give it a shot and let the citrusy goodness brighten your kitchen!
PrintLindy’s Lemon Ice Recipe

Lindy’s Lemon Ice is a refreshing and simple homemade lemon-flavored ice beverage, perfect for hot days. Combining lemon extract with sugar, citric acid, and water, this icy treat is quick to prepare and serves as a delightful cooling drink for gatherings or personal enjoyment.
- Prep Time: 1 minute
- Cook Time: 0 minutes
- Total Time: 1 minute
- Yield: 6-8 servings
- Category: Beverage
- Method: No-Cook
- Cuisine: American
Ingredients
Liquid Ingredients
- 2 quarts Water
- 2 Tablespoons Lemon Extract
Dry Ingredients
- 3 cups Sugar
- 2 Tablespoons Citric Acid
Other
- Pebble Ice (to serve)
Instructions
- Combine Ingredients: In a large drink dispenser, pour in 2 quarts of water, add 2 tablespoons of lemon extract, 3 cups of sugar, and 2 tablespoons of citric acid. These ingredients create the flavorful base for the lemon ice.
- Mix Thoroughly: Stir the mixture well until the sugar and citric acid are completely dissolved and everything is combined evenly, ensuring a consistent flavor throughout.
- Add Ice and Serve: Fill the dispenser or serving glasses with pebble ice. Serve immediately to enjoy a cold, refreshing lemon ice drink.
Notes
- Adjust the sugar amount to taste if you prefer it less sweet.
- Citric acid enhances the tartness; do not omit as it is essential for authentic lemon ice flavor.
- Use pebble ice for the best texture, but crushed ice can be a substitute.
- This recipe is best served fresh and does not require refrigeration prior to serving.
- For a larger or smaller batch, maintain the ingredient ratios accordingly.


